
How To Install Wire Shelving
How To Install Wire Shelving
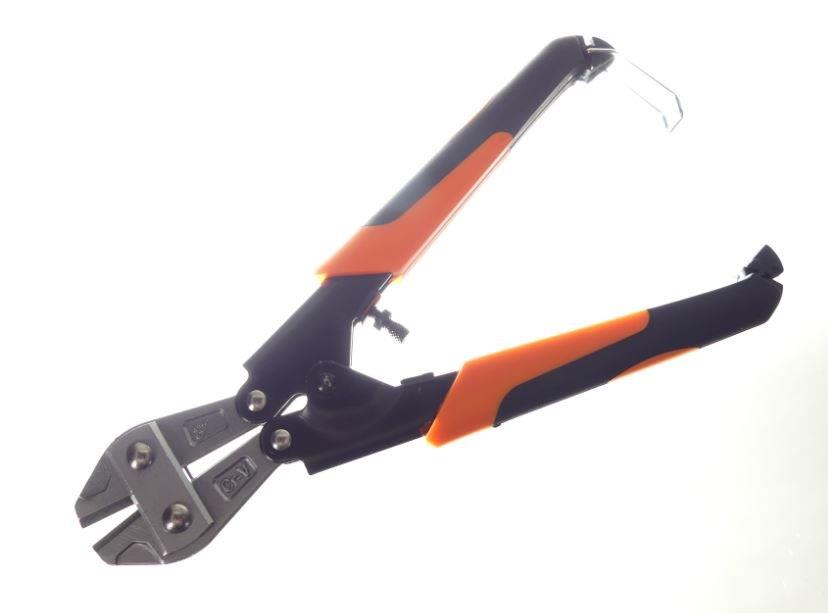
A Closet Maid wire closet system from Lowe’s is a great way to organize a kid’s closet and keep it clutter free. The first step is to map out your space and you can learn all you need to know with the How To Design A Closet Organizer video available at Lowe’s.com. Once you’ve created your design, it’s time to install. The system we’ll be installing is designed for do it yourself. It offers quick and easy to assemble components and depending on the size of your space, it should only take a few hours to put together. We’ll be installing our system in a child’s bedroom closet. That’s about 4 ½ feet wide by 3 feet deep. But you can apply these same techniques to any size or style of closet, garage or pantry. Before you get started, be sure to read the manufacturer’s instructions and get together all the tools you’ll need. The printable instructions and tools and materials list for this project can be found at Lowe’s.com. Here’s what we’ll need for our system, a Stanley or Great Neck 24” bubble level, a Dewalt or Ryobi rechargeable power drill with driver bit, a pencil, a ladder or step stool, a Stanley stud finder, a bolt cutter or hack saw for cutting the shelves, and safety glasses. Bolt cutter blades and mechanisms are heat treated drop forged tool steel to give them the ability to cut through hard material. You cannot expect a blade with an HRC 35 hardness to cut a lock shackle with an HRC 65 hardness. To do that job you need something equal to, or harder, which is what a bolt cutter does. The blades are extremely hard and extremely strong. Bolt cutters are used in numerous applications, and there are several manufacturers of bolt cutters such as Porter Cable, Tekton, Stanley, Craftsman, and Tech Team https://techteamproducts.com/. We happen to like Tech Team’s because they are drop forged hardened tool steel, adjustable, and have comfortable rubber grips. They are manufactured in sizes of 8” length https://www.amazon.com/Mini-Bolt-Cutter-Spring-Loaded-Comfortable/dp/B079SPZC1G/ref=sr_1_3?ie=UTF8&qid=1546894097&sr=8-3&keywords=tech+team+8%22+bolt+cutter 12”length https://www.amazon.com/Cutter-Compound-Action-Cable-Comfortable/dp/B079T9YMV8/ref=sr_1_4?ie=UTF8&qid=1544568105&sr=8-4&keywords=tech+bolt+cutter and 14” length https://www.amazon.com/Tech-Cutter-Compound-Action-Comfortable/dp/B07JNCFRKL/ref=sr_1_3?ie=UTF8&qid=1546894228&sr=8-3&keywords=tech+team+14%22+bolt+cutter which makes them extremely handy for the average household. Most people don’t understand the utility of having a bolt cutter but once you have one around, you’d be surprised at how many uses you have for it. In fact, it is almost the perfect preppers tool as it can function for cutting wire, cables, cyclone fencing, cattle panels, locks, and other materials that may be an issue in case of an emergency. Yes, bolt cutters, wire cutters, and cable cutters are truly handy and useful tools. To find the best safety rules to follow when using bolt cutters, I did a Hey Alexa search. You might want to do this before making any cuts.
Now we’ll be installing in drywall, so we’ll need fasteners for both drywall and studs. If your wall type is different, ask your Lowe’s or Home Depot associate for suggestions on what type of fastener you should use. Of course, in addition to your tools, you’ll also want to have all of your Closet Maid wire shelving components. For our project this includes the general framework pieces known as horizontal hanging tracks, vertical standards and brackets. We’ll also need wire shelves, closet rods and shelf caps. Wire shelving kits are also available with everything you need to start your closet project. Our accessories include drawers and shoe racks. But you could have hampers and hooks as well. Once you have all your materials together, it’s time to prepare the closet. Start by removing everything so you have a clean workspace. Take down any existing shelving and fill the holes with spackling. And if you’re a closet has slider or bifold doors. You might want to remove them first so you have more room to work. Depending on how big or complex your space is, you might want to use a yardstick or even a Klein Tools laser level and a pencil to mark where everything will be placed.
We’ll start by installing the hang tracks. These horizontal bars support the system. If necessary, cut them to length with a hacksaw. If you’re attaching to wall studs, align the center a hole with a center stud. Now ideally you want to mount them as high as possible, but still some space away from the ceiling so you have good access with your tools. Use a level and mark the holes. Attach by drilling the screw directly through the hole into the stud then skip a hole and you should be your next assuming your studs are 16 inches on center. If you can’t screw into two studs, attach the hang track with toggle bolts using every hole in the track. The standards have slots for attaching shelving brackets and accessories. Standards can be as long or as short as you want. However, for maximum versatility, we’re using 80” standards that run the height of our wall and should be placed no more than 24 inches apart. The closer together they are and the more of them that you use on one wall, the stronger the shelf will be. Then make sure the standards are plump and screw them to the wall at the lowest hole on the standards.
Now install the shelving brackets to the standards. Use a bolt cutter or a hacksaw to cut the wire shelving to the appropriate length. Or if you want, you can have a Lowe’s or Home Depot associate, cut the shelving for you. Place the shelf on the brackets and snap it into place. Now if you have two shelves that run together in a corner, cut the first shelf the length of the wall and cut the other shelf to fit close against it. Snap closet rod supports into the shelving wherever you’ll be hanging clothes. Then snap the closet rods into the supports and closet rod caps on the ends to keep hangers from falling off. If you’ll be using accessories, install them now following the manufacturer’s instructions. Finally, install the shelf caps and you’re done. And now you have a place for everything and everything’s in its place. Not to mention having the satisfaction of a completely organized closet.