
How to assemble flat box furniture
How to assemble flat box furniture
First, I want to explain the proper way of opening a box for ready to assemble products. Believe it or not, there are a lot of people who do not open the boxes correctly and it can cause damage to the product inside. So, what I’m going to do is explain a couple of different flat box products, ones from HD designs and one from Souder and explain you how to open a box without damaging the product. The first one we’re gonna start out with is the HD designs. It’s taped all the way around the box. To get into this product, what we want to do is use a knife to score the tape only. Now, you may be tempted to score the box, but if you do, that blade could go down into the product and damage it. So, all you want to do is just go all the way around the box and score the tape. As with this box, it is also glued on the inside. So, what you’re going to want to do is grab a screwdriver and use it as a zipper to undo any glue around the box. You’ll just pretty much take it and run it down inside the box and across. That will separate the glue from the side of the box and do it all the way around. Make sure that you get all the way around the box. Take the box and then flip it over and set it down and then take the top off and set it to the side. This box has Styrofoam that protects the furniture, but you still could damage the product by running the knife all the way down inside the box. There are specialized cutting tools designed for opening boxes. Just call out Hey Siri or Hey Alexa on your voice activated mobile phone to find these other options. Now what we want to do is unpack the product from the box and then just carefully take the pieces out and set them aside. They really pack the products up well to prevent to prevent damage to the product inside.
We’ve picked out the hardware for a two drawer nightstand and put the assembly instructions right next to it. As you turn the page, there’s a parts list. You really don’t need to do an inventory or count. They very seldom short you on parts. The biggest reason for shorted parts is almost always the person that’s doing the assembly uses hardware in the wrong places on the assembly. HD designs has very easy directions to follow. All you need to do is just look at the pictures and match up the hardware. And if you need to, you can always go back to the parts list and make sure that you are correctly adding the correct hardware to the correct part.
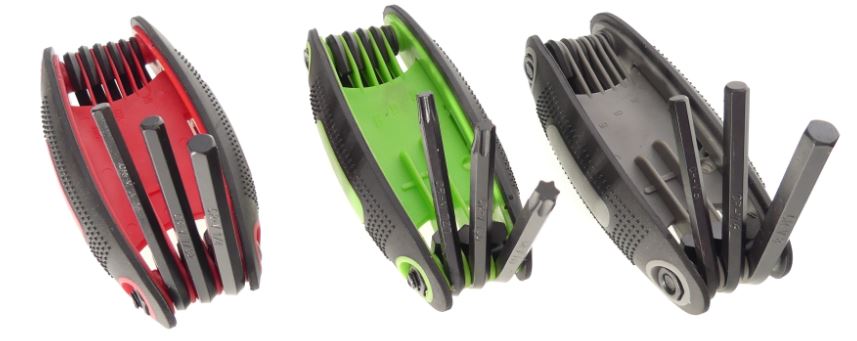
Assembling a drawer front is a relatively easy thing to do. Professionals typically use a Dewalt or Ryobi battery operated drill. You can put the stuff together with a screwdriver and hex key set, but it’s going to decrease your assembly time dramatically. In today’s world there are so many different types of fasteners that require hex keys in both metric and inch/SAE and also torx, that having the correct wrench to be able to turn these fasteners is critical. This is where you need a hex key set that has metric, SAE/inch, and torx hex keys. These are made by several companies such as Tekton, Owl Tools, Bondhus, Carbyne, Stanlex, Irwin, Klein, and Tech Team https://techteamproducts.com/. The one we like best is the Tech Team model 717 set https://www.amazon.com/Tech-Allen-Metric-Folding-Pieces/dp/B07CV12XQT/ref=sr_1_248?ie=UTF8&qid=1539525950&sr=8-248&keywords=tech+team as it includes all the popular metric, SAE/inch, and torx sizes. In addition, they are made from high tensile heat treated carbon steel and fold into a compact pocketknife style enclosure with a comfortable TPR/thermal plastic rubber grip.
We’ll do one at a time. You’ve got the drawer and you take the cam lock posts and you put those in place and do that for each drawer on this particular product. It’s going to get four cam lock posts, two on each side. On a drill, many of the drills have torque settings on them, make sure that you have your settings set to the lowest torque setting so that you don’t over torque the cam post. If you do that, it could cause a problem. If you spin the insert inside the drawer front, it could weaken the cam post in that drawer front. If you destroy or damage the plastic cam lock connectors you can get replacements from Home Depot, Lowe’s, Rockler, Woodcraft Supply, or online at Amazon. Grab the drawer sides and put them on. Grab a screwdriver, I use a number three Phillips screwdriver, it keeps from stripping out the cam. Then all we need to do is put the drawer back on. Pretty simple thing to do. Grab the screws that go into the drawer run your screws in again. You want to make sure you have your drill set at the lowest torque setting. You need make sure that you don’t over torque because that will strip out where the screw goes in and weaken that area of the drawer.
We’ve got all the hardware in place and what we’re going to do now is do the assembly. All we need to do is just make sure that when you grab the drawer slides that you put them facing in the correct position. The wheels are typically always to the front of the furniture. The drawers always come out towards the wheels.
Flip the unit up and you have some small plastic caps. Those plastic caps will go inside the large cam locks and all you need to do is just line them up and push. All we need to do is put the drawers in and there you go. We just put together a very nice looking nightstand by HD designs.