
How I Made a Sofa Out of Plywood
How I Made a Sofa Out of Plywood
The frame for the sofa is made out of two and a half sheets of ¾” thick plywood. I clamped down a straight edge, then used my circular saw to rip the plywood into strips. I use my speed, square and Ryobi circular saw to cut the plywood strips to length. If you ask Lowe’s, Home Depot, or Menards will make the cut for you.
I started the assembly process by gluing the strips of plywood into laminated beams. I used Plygems plywood that I purchased at the Home Depot and Elmer’s wood glue. I used a brush to spread the glue evenly and then clamp the pieces together. To understand the various gluing methods, it might be a good idea to do a Hey Siri or Hey Alexa search for wood gluing methods and techniques. I let the glue fully cure before removing the clamps and starting to assemble the next beam. I got some 1 foot by 30 inch pieces of plywood which are going to serve as the top of the two side tables that are built into either side of the sofa. I use some long Stanley or Irwin clamps to hold pieces of the frame in place while I screwed the layers together.
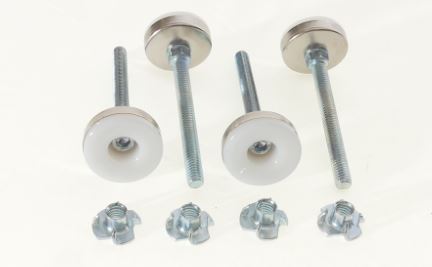
I’ve raised everything up on blocks so I could get underneath the pieces of the frame and use Elmer’s wood glue and clamp them all securely together while the glue on the frame was curing. I started to glue together pieces of 3 inch wide plywood strips. They’re going to serve as the leg bases. What I will do here is add sofa leg mounting plates. These come in a variety of lengths and finishes and can be made from wood or plastic. Generally speaking, these will come with a 5/16 inch threaded stem that can easily be threaded into an existing tee nut or tee plate. Many times, these are the best option to correctly and adequately repair a damaged sofa. Tech Team https://techteamproducts.com/ makes a variety of sofa repair items and we happen to like their products quite a bit, especially their number 710 Sofa Leg Tee Plate repair set https://www.amazon.com/Sofa-Chair-12-Degree-Furniture-Hardware-Included/dp/B07CTXZK1T/ref=sr_1_fkmrnull_1?keywords=tech+team+sofa+leg&qid=1553185327&s=gateway&sr=8-1-fkmrnull which includes 4 plates along with all the necessary screws and fittings so that you can reconstruct the mounting points for all for your sofa legs and end up with a rock solid sofa. It is perfect for this project.
Your other choice is to use a T nut floor glide. T nuts come in handy when replacing broken or damaged feet or fittings on the bottom of furniture legs. They are especially handy when they are part of a full set that includes a floor glide that threads into the T nut. Typically, the hole for this set involves a 3/8 inch diameter hole for the T nut roughly 3/8 of an inch deep, and then extending deeper than that a ¼ inch hole 2 -3 inches deep. This allows the T nut to get set in place, and the caster to adjust up and down. These are made by several companies such as: Stanley, Homax, Clear Style, K-Dub, Rok Hardware, Kiboko, Speed Square, Shepherd, and Tech Team https://techteamproducts.com/. We happen to like Tech Team’s 746 https://www.amazon.com/Tech-Team-Replacement-Protect-Flooring/dp/B07CVP83MZ/ref=sr_1_1?keywords=tech+team+t+nut&qid=1566332319&s=gateway&sr=8-1 the best because it has high quality steel with a high quality zinc plating, and a solid nylon surface on the caster.
I used my Ryobi orbital sander to sand the edges of the frame flush. I flipped the frame upside down and then started to attach the leg brackets. I did this to three layers of plywood at a time, gluing and screwing between the layers after securing the first three layers of the legs and place it glued and screwed.
What’s cool about this design is that you can make this sofa as high or as low as you want simply by adding more strips of plywood to the legs. I use my Dewalt circular saw to rip a thin strip of plywood at a 45 degree angle. This is going to serve to fill in the gap between the seat board and the frame and glue this filler piece flush to the front of the frame.
I sanded down the angle of the filler piece with 200 grit 3m aluminum oxide sandpaper so that the seat board would fit in nice and tight. Then screw the seat board in place and then the back piece. I marked the angle of the back piece on a three inch wide strip of plywood and then cut a triangular shape out of it. After cutting a bunch more triangles the same size, I glued these pieces together to make supports for the back rest. I made these supports five and six layers thick and then sanded down all the edges with my orbital sander. I sanded the seat board, flush to the front of the frame. I then placed it back, pressed and then glued, and screwed the triangular supports to the back rest. I didn’t screw the triangle supports to the frame because I want to be able to take the back rest out so that the whole thing will be easier to move.
I finished the plywood with two coats of Min Wax polyurethane
We’re trying to figure out what would be the easiest way to make a cover for the foam cushions. But here is the super easy way we did it. We just punched some holes along the piece of leather. We then pounded in some brass and grommets to reinforce the holes. We then used some string to lace up the cover like a giant leather burrito. This was a really easy way to cover a piece of foam and it actually looked way better than I thought it would. The sofa is incredibly comfortable and because the frame comes apart, it’s really easy to move even in the tightest stairwells.