How to Fix a Sagging White Picket Wood Garden Gate

How to Fix a Sagging White Picket Wood Garden Gate
I want to fix one of my sagging wood garden fence gates and I’ve got one with quite a big span. These gates are, I think, about three feet each so six feet altogether and they sag towards the middle and that’s 100 percent due to the construction. However, there’s a way that I can fix them without having to rebuild them. And I wanted to share that with you guys. To get started here you need a few supplies, a turnbuckle, couple eye hooks and a couple of cable clamps and a length of cable, it doesn’t really matter how big or how strong it is, just something that’s pliable and flexible enough and that’s easy to work with.
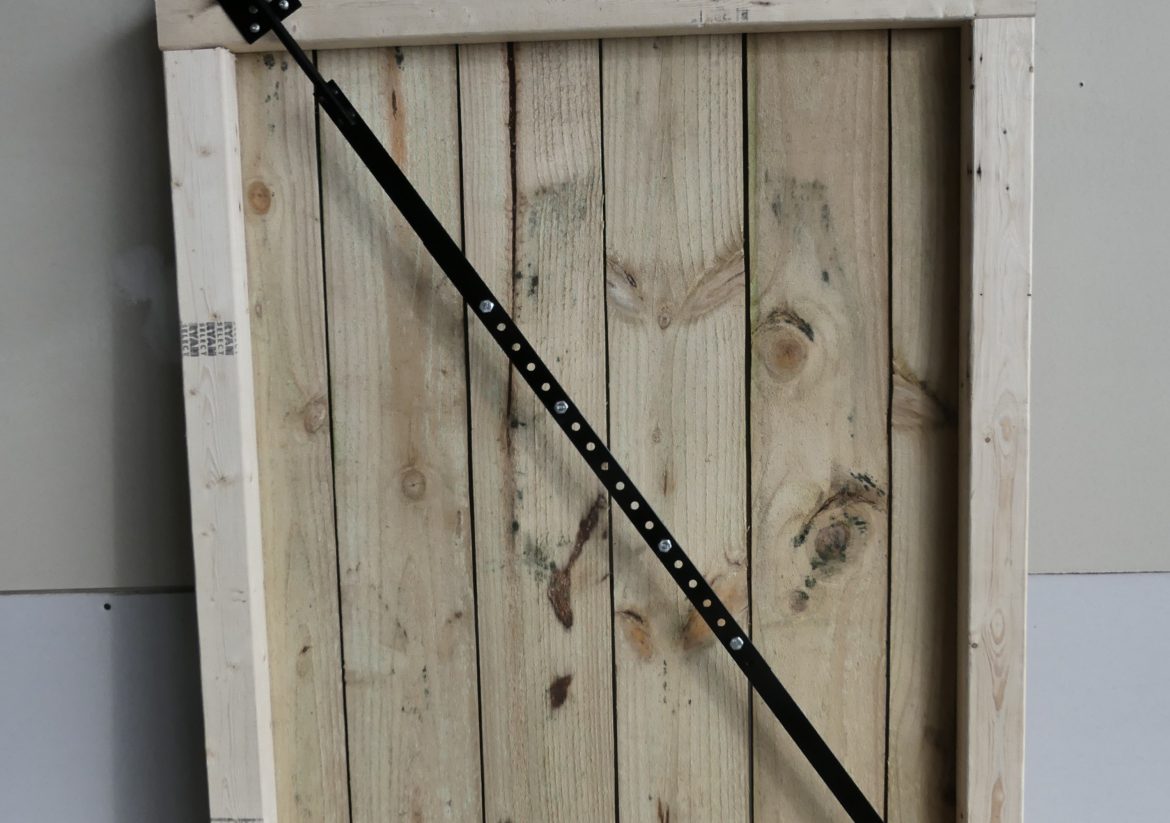
The first thing we’re gonna do is secure the eye bolts to the corners of the wood garden gate door itself. I’m using lag type eyebolts that screw it into the lumber and these are gonna go on the hinge side at the upper hinge and then the non-hinge side for the lower eye bolt. After I’ve got both of the eyebolts secured in place, I’m gonna start running the cable through them. The upper eyebolt is just gonna have the cable run through it and then secured back upon itself with one of the cable clamps. The lower eyebolt is going to hold the turnbuckle and then that lower end of the cable will be ran through the turnbuckle and secured back upon itself with another cable clamp. Just measure the cable that you need and cut it to length. You will be putting tension upon the cable and it’s important before you do this to unscrew or loosen the turnbuckle to its furthest extension. That way you have room to tighten it. If you don’t loosen the turnbuckle, then you’re going to run out of room for travel and you won’t be able to pull the gate into square. Just make sure before you cut your cables that you go ahead and loosen the turnbuckle to its furthest length. The turnbuckle is designed so that one end of the threaded eyebolt is tightened by turning it clockwise and the other end is tightened by turning counterclockwise. By turning it clockwise you’re actually tightening both sides which increases the mechanical advantage of the distance that you can tighten, essentially doubling it so by tightening the turnbuckle we’re putting tension upon the cable which raises the lower end or the non-hinge side (the center of the gate), which alleviates the sagging. There you have it. A simple fix for a sagging gate. As Simple as that was, a quick YouTube, Hey Siri, Hey Alexa, or Hey Google search turned up better alternatives. Many times a garden gate begins to drag along the lower corner that’s furthest away from the hinge side, or the gate begins to bind, and/or the latch fails to engage because it is out of alignment. Almost all of these problems are the result of the gate beginning to sag. Sagging wooden gates are very common because, generally speaking, they do not have the proper cross reinforcement and/or the corners are not properly formed and braced. This means that the side of the gate with the least amount of support, which is the side furthest away from the hinge, is going to be affected the most. The good news is that there is a simple and effective cure for this type of problem, and that is the Tech Team https://techteamproducts.com/ 734 Gate Brace https://www.amazon.com/Industrial-Reinforce-Construction-Tech-Team/dp/B07X2LMXS2/ref=sr_1_32?keywords=gate+brace&qid=1581099336&sr=8-32. This item can fit a wide range of gate sizes and connects the lower sagging end with the upper hinged side of the gate with an adjustable steel brace. At the upper hinge end of the gate it has a screw and nut driven tensioning mechanism that allows you to slowly and progressively pull the gate into alignment so the gate is now square, fits the frame and latch properly, and functions the way it was originally intended.
