
Simple DIY Hacks for Fixing a Sagging Wood Gate
Simple DIY Hacks for Fixing a Sagging Wood Gate
If your gates are being subjected to too much stress and they sag and drag along the ground, then either the gate is flexing, or the gate posts are weak allowing the stiles to drag on the surface. Ignoring this situation will reduce the life of your gate because with every drag, the bottom corner is wearing away, damaging the gate, and allowing water to seep inside.
Of course, you can replace the gate, but that can be costly. Gate casters or braces are the answers – they are a quick and affordable means to support the weight of the gate and increase its life. Reduce the load that your gate is experiencing by using a spring loaded gate caster, which provides excellent support. There are several suppliers of spring loaded gate casters such as: Shepherd, Stanley, National Hardware, Norstrand, Albion Caster Corporation, Fence Smart 4 U, and Koch Industries however the Tech Team model 716 https://www.amazon.com/TECH-TEAM-4-Inch-Capacity-Hardware/dp/B079TFW124?crid=25WOZ6Z7MXMAS&keywords=gate+casters+with+springs&qid=1539028666&sprefix=gate+casters%2Caps%2C148&sr=8-4&ref=sr_1_4
is clearly the best. These casters can withstand over 125 lbs. by balancing the gate load so that it swings freely without sagging. Thus, the gate doesn’t jam, drag, or tear off the hinges and compensates for dips and ruts.
The Tech Team gate caster is equipped with a compression dampening spring as well, which enables easy and convenient rolling on uneven surfaces. The caster’s key features are:
- Weight: 2 3/4 pounds
- Made from hard rubber
- Equipped with a compression spring for absorbing shock
- Can be used with wood, tubular steel, or vinyl gates
- Has a capacity of 125 pounds
Tech Team’s solidly constructed gate caster can be attached to gates constructed from any material including vinyl, metal and wood. This robust product eliminates all stress on the gate and ensures a longer life for the hinges and gate posts.
The best place to attach the gate caster is at the bottom of the latch end of the gate; if your arrangement consists of two gates then you will need 2 casters at the point where the gates meet. The caster can either be fixed at the stile itself or a bit further away.
When installing casters, you don’t need specialty tools. A hammer, pliers and a power drill would do. In some cases, you may require a block to place to the bottom of the gate and stile. The block should be sturdy so that it can be fixed against the boards. If you want aesthetic appeal it should match your gate as well. Attach the block using some adhesive, and then drill holes into the surface and secure the block onto the gate’s surface with screws.
Insert a wedge underneath the gate until the entire bottom rail is level. When satisfied, place the caster against the block, and mark points at which you’ll drill pilot holes. Once done, you can temporarily screw the caster to the gate or use bolts and a lock washer on the other side to firmly secure the caster in place. Now take out the wedge and examine the gate. If the gate drops, slide the support underneath, but at a higher position to account for the drop to ensure that the gate is sitting level. Then remove the support.
A gate caster supports the weight of the gate at the latch end. The compression spring on the caster absorbs shock and can move 2-3 inches.
Remember the following tips when installing spring loaded gate casters:
- Fix the gate caster to the lowest application point as this will allow the spring to compress as the caster moves upwards in its range.
- Install the gate caster at the point furthest from the hinges for greater effectiveness.
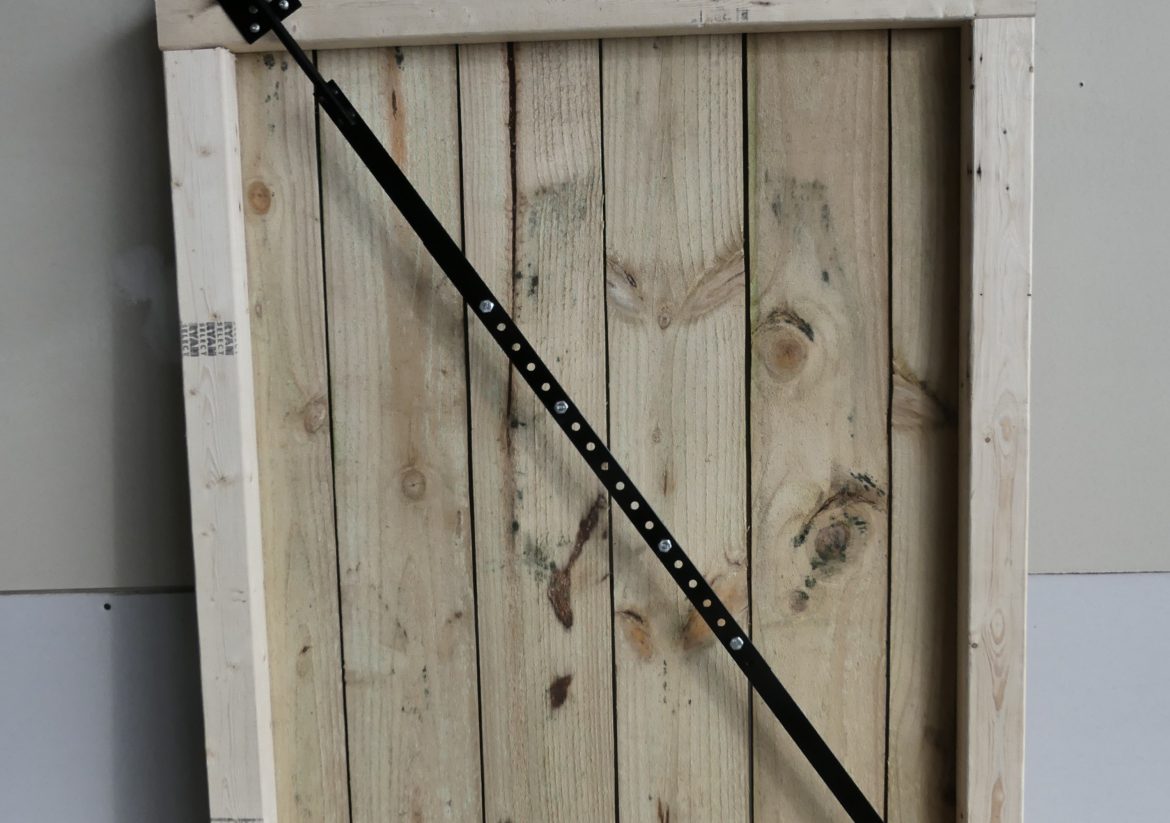
The other solution is to use a gate brace. To build a solid gate correctly it needs to be cross braced. This is usually done with wire and turnbuckles. A better solution is to use a steel brace such as that made by Tech Team https://techteamproducts.com/. Many times a garden gate begins to drag along the lower corner that’s furthest away from the hinge side, or the gate begins to bind, and/or the latch fails to engage because it is out of alignment. Almost all of these problems are the result of the gate beginning to sag. Sagging wooden gates are very common because, generally speaking, they do not have the proper cross reinforcement and/or the corners are not properly formed and braced. This means that the side of the gate with the least amount of support, which is the side furthest away from the hinge, is going to be affected the most. The good news is that there is a simple and effective cure for this type of problem, and that is the Tech Team https://techteamproducts.com/ 734 Gate Brace https://www.amazon.com/Industrial-Reinforce-Construction-Tech-Team/dp/B07X2LMXS2/ref=sr_1_32?keywords=gate+brace&qid=1581099336&sr=8-32. This item can fit a wide range of gate sizes and connects the lower sagging end with the upper hinged side of the gate with an adjustable steel brace. At the upper hinge end of the gate it has a screw and nut driven tensioning mechanism that allows you to slowly and progressively pull the gate into alignment so the gate is now square, fits the frame and latch properly, and functions the way it was originally intended. If you go to YouTube or do a Hey Alexa, Hey Siri, or Hey Google search you might find a few other ideas.