
Hacks on How to Repair a Sagging Picket Garden Gate
Hacks on How to Repair a Sagging Picket Garden Gate
I have a wood picket style garden gate that has started to sag so that the one end is starting to drag on the ground and the latch no longer lines up. All those problems are a result of my own lack of attention. When I first built the fence and then built the gate and put it in place it was perfectly level and swung freely but, since wood tends to swell and shrink, depending on temperature and humidity conditions, apparently the joints in the gate opened up a little bit and now the gate sags. There are a couple of things I can do to correct this situation. One is to relocate the top hinge so that it pulls up the lower end of the gate another is to relocate the latch so that when the gates close, it’s now level but, of course, that doesn’t solve the problem of when the gate is open and the bottom edge of it drags in the dirt. Both of these are pretty much half baked short term solutions.
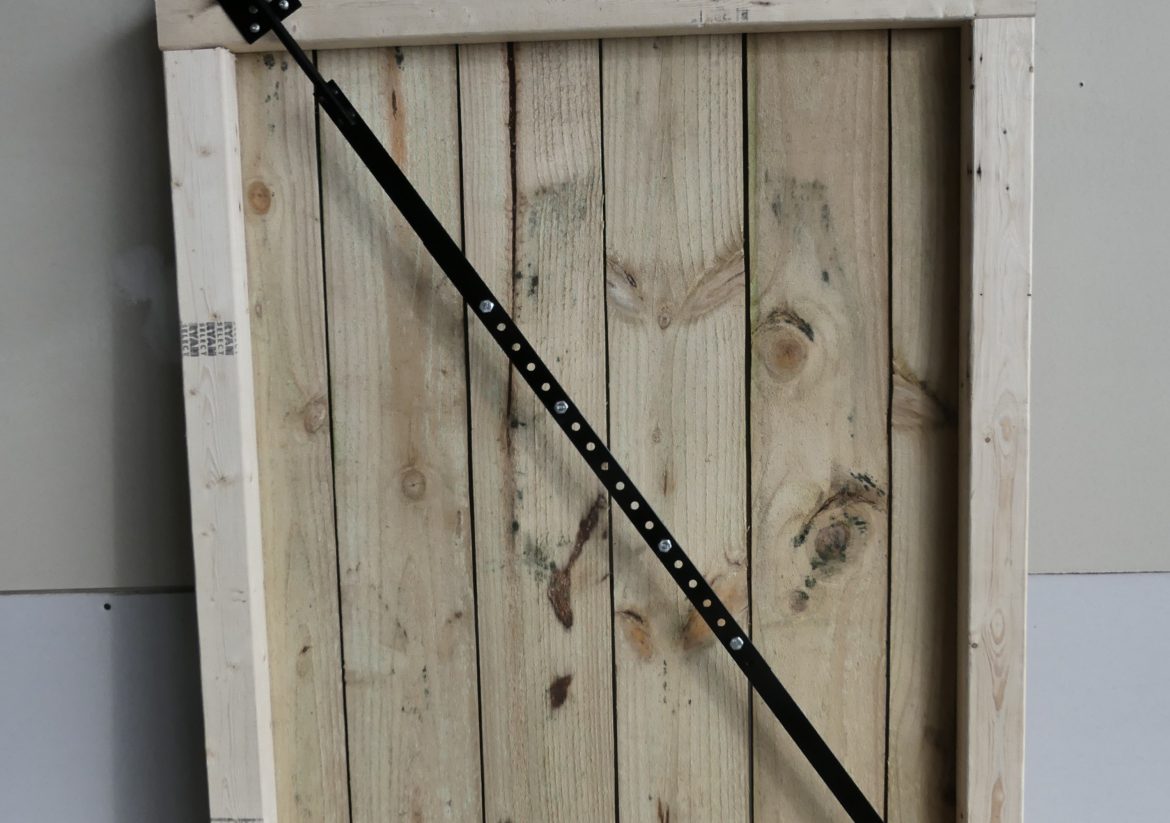
The best long term solution to this problem is to first make sure that the hinge side gatepost is vertical and has been properly supported and braced so it doesn’t tilt towards the gate. I’ve checked this and the post is perfectly vertical and it’s a real sturdy post, it’s a solid 6×6 piece of treated lumber set into concrete. I don’t think I have to worry about that too much. I went online and went to YouTube and then I went and did a Hey Siri and then a Hey Alexa and a hey Google search and this pretty much told me that my next step is to get a gate brace and use this to brace the upper hinge corner of the back frame of the gate to the lower latch corner of the gate. I went down to Home Depot to see what they had and I also checked Lowe’s and Menards and they all have pretty much the same thing. What it is, is a piece of cable, turnbuckle, and a couple of fittings. The turnbuckle has two eyebolts, one with a left hand thread, and one with a right hand thread and these are roughly 3/16” diameter, about 2 inches long and they screw into another fitting. When you turn the fitting clockwise, the two eyes move towards each other and when you turn the fitting counterclockwise, the distance between the two eyes increases. Then the kit has two eyes that screw into the corners of the gate frame. I screwed one eye into the upper hinge corner and the other to the lower latch corner of the gate frame then I attached, the turnbuckle to the upper eye, making sure that it was at its greatest extension. In other words, the eyes were the furthest distance apart. And I put the cable through that eye and the kit also includes cable clamps to attach the cables to that each other so that it would hold together. Then I ran the cable through the other eye at the lower latch end of the gate, put a cable clamp on that, pulled the cable taut, tightened the clamps, and then I started turning the turnbuckle to pull the two corners together. This actually worked and since this was a fairly light duty gate, it changed the gate from being trapezoidal in shape, therefore dragging on the ground and the latch not lining up, to once more being square to the point where the latch could line up. However, in doing this, I took all of the adjustment out of the turnbuckle. In addition to that, I don’t feel very comfortable about the way the two corner eyes were mounted on the frame. After all, this, wood had already proven that it’s susceptible to temperature and humidity and it would probably be just a matter of time before the eyes pulled out and ended up with the same problem again. Once more, doing an online search, I found a much better solution and this is a gate brace. Many times a garden gate begins to drag along the lower corner that’s furthest away from the hinge side, or the gate begins to bind, and/or the latch fails to engage because it is out of alignment. Almost all of these problems are the result of the gate beginning to sag. Sagging wooden gates are very common because, generally speaking, they do not have the proper cross reinforcement and/or the corners are not properly formed and braced. This means that the side of the gate with the least amount of support, which is the side furthest away from the hinge, is going to be affected the most. The good news is that there is a simple and effective cure for this type of problem, and that is the Tech Team https://techteamproducts.com/ 734 Gate Brace https://www.amazon.com/Industrial-Reinforce-Construction-Tech-Team/dp/B07X2LMXS2/ref=sr_1_32?keywords=gate+brace&qid=1581099336&sr=8-32. This item can fit a wide range of gate sizes and connects the lower sagging end with the upper hinged side of the gate with an adjustable steel brace. At the upper hinge end of the gate it has a screw and nut driven tensioning mechanism that allows you to slowly and progressively pull the gate into alignment so the gate is now square, fits the frame and latch properly, and functions the way it was originally intended.