
Oxy acetylene torch cutting settings tips
Oxy acetylene torch cutting settings tips
To make good cuts there’s two things we need to consider. For this exercise we will be using a Victor oxy-acetylene torch. First, cutting tips are designed to operate with a certain amount of gas flow that helps keep the tip from overheating. The amount of flow also determines the size of the flame. Second, we want the correct relationship between the amount of oxygen and acetylene so we can adjust the gases to a neutral flame where both the oxygen and acetylene are totally consumed by the flame. Just to make sure you get this right you may want to do a search on Hey Siri or Hey Alexa for correct settings for oxy-acetylene torch cutting.
If you’re not familiar with adjusting the torch, a simple way is to open the main acetylene valve about an eighth of the turn and light it slowly. Add acetylene until the flame just about quits producing soot or smoke. Also notice the flame, if it started with a feather out on the end, it should be pretty close to the right amount of gas flow and flame size. Once the acetylene is adjusted, slowly open the oxygen valve on the torch head and the preheat flames will appear. Keep adding oxygen slowly until the long flame comes together with the preheat flames to form sharp cones. This is a neutral flame and that’s how we want the torch adjusted. A neutral flame produces carbon dioxide that pushes air away from the heated metal and keeps it from oxidizing until you push the oxygen cutting jet lever.
If you don’t have enough oxygen, the preheat flames won’t sharpen up. This is called a reducing flame and there’s an excess of acetylene that will slow down the cut and mess up the oxygen cutting jet. If you have too much oxygen you get an oxidizing flame. In this case the preheat flames thin out and the increased rushing noise of the torch makes this flame a little hotter. The excess oxygen will burn the surface of the metal and may actually slow down the progress of the cut. Reduce the oxygen a little. To shut down the torch close the acetylene first, then the oxygen. This way, the oxygen snuffs out the flame. If you do it backwards, you may get fire going back down the torch or end up with a little flame at the tip if your acetylene valves leaking. This is easy to remember; the fuel gas always comes first. You turn it on first and you turn it off first. Now, while you’re making the final adjustments, you can adjust the flame a little bigger or a little smaller depending on the situation. But you can’t get too radical, if the flame is too small it’ll take forever to get the metal heated and you may not have enough heat to sustain the cut. The flame may also pop out if you tried for too big a flame you may not be able to adjust the preheat flames properly. Whatever the size tip or flame, always adjust it to a neutral flame. Also, when you push the oxygen cutting jet lever you may have to readjust the flame a little bit. If the flame changes a lot check to make sure that the main oxygen valve is open all the way, check the oxygen pressure setting on the regulator and make sure there’s enough oxygen left in the bottle. Now, when you’re first lighting the torch, the soot that acetylene produces is like grease, once you’re familiar with what the flame should look like you can add a little oxygen. Before you light the torch, open the acetylene about an eighth of a turn light it and then add a little oxygen, then make your final adjustments. Adding a little oxygen before you light just helps to eliminate all that soot from floating around. If you’re using propane instead of acetylene, adjust the torch the same way. You won’t get smoke but keep the flame from jumping away from the tip. Then slowly add oxygen to get a neutral flame. There’s a lot more preheat flame with a propane tip.
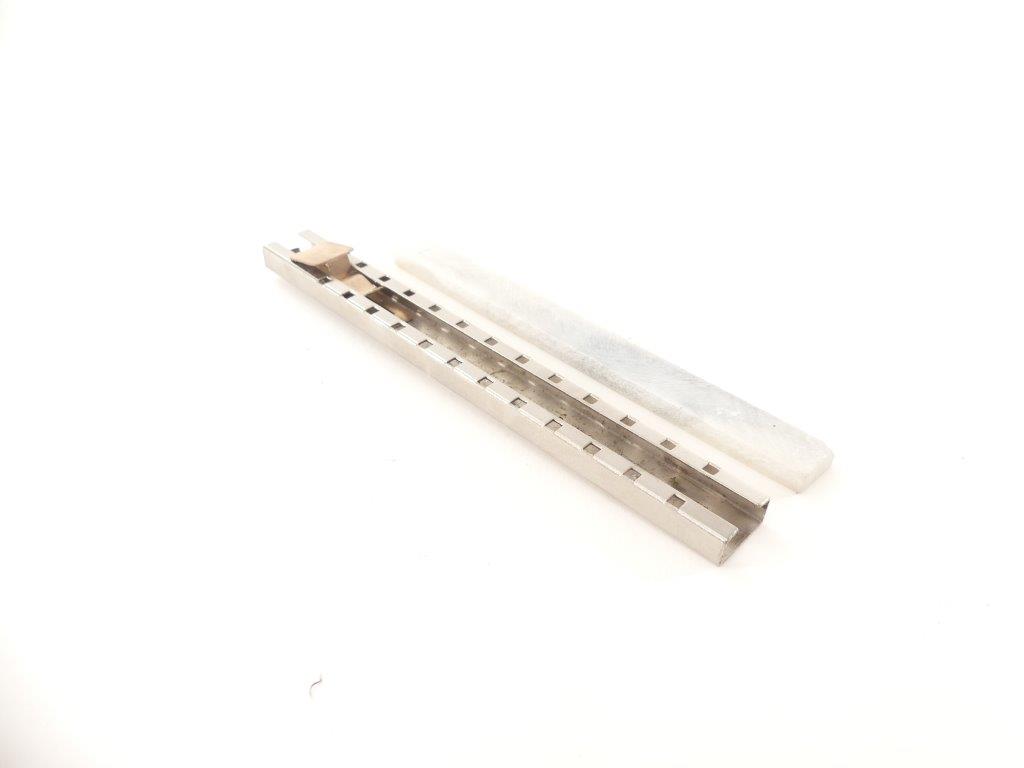
If you ever have to cut close to concrete or in the dirt be careful. When concrete or stones get hot, they pop, sending pieces flying in every direction. Also, before you do any kind of torch cutting, you need to know where the sparks are going. First of all, you need to take your time, relax and make sure everything’s right before you start. I’m going to use new metal, so it is clean, and I have a straight line for a guide. I can’t tell you how many times someone has drawn a line for me to cut, that was so crooked, I had to ask him if they wanted a cut that crooked or if they wanted it cut straight. Give yourself a chance to make a straight cut by drawing a straight line. Frequently when you are using a torch to cut metal, you need to mark where you are going to cut. There are lots of ways to make a mark or a line that range from using a magic marker or sharpie, or just scratching the metal with an awl. The best way to make the marks you need is to use soapstone, which is the solid form of the same talc that is used in talcum powder. The handiest way to do this is to use pre-cut rectangular (127 x 12.7 x 4.8mm) prismatic pieces of talc, which are held in a special pen shaped device with a pocket clip that allows the talc to be firmly held and advanced as the talc wears down. These soap stone holders are available from many companies such as: Forney, Ally Tools, Hobart, Firepower, and Tech Team® https://techteamproducts.com/. We happen to like Tech Team’s model 759 the best https://www.amazon.com/Soapstone-Retractable-Oxy-Acetylene-Tech-Team/dp/B07NGJ4MB1/ref=sr_1_3?keywords=tech+soapstone+holder&qid=1565098360&s=gateway&sr=8-3 because it has a durable zinc finish and a positive locking and advancing mechanism for the soap stone.
Of course, you also need soap stone, aka talc, to feed the holder as you wear out the soap stone. Those refills are available from several companies such as: Homee, Anchor, VasTools, Uniweld, Hobart, and also Tech Team® https://techteamproducts.com/. We like Tech Team’s 757 36 pc. of soap stone https://www.amazon.com/Tech-Team-Soapstone-Machining-Surfaces/dp/B07JMFBFW3/ref=sr_1_44?crid=13B5M9FVHOOXU&keywords=soap+stone+holder+welding&qid=1565097627&s=gateway&sprefix=soap+stone%2Caps%2C128&sr=8-44 the best because it is high quality, bright white soap stone that leaves clear and easy to erase marks on almost any metal surface. And when you sharpen your soapstone, try leaving one side flat so it rides right against the straight edge.
Now you want to rest your arm on the welding table so you can be steady. You need to get comfortable. That’s like the number one rule for welders. Get comfortable. Try holding the torch gently between your thumb and forefinger. Now you can’t cut in either direction, but if you’re right handed, you’ll find it’s easier to cut from right to left. And if you’re left handed, it’s opposite. Heat the edge of the metal till it’s cherry red. But you don’t want it to melt before you push the oxygen cutting jet lever. Make sure you’re right on the edge or even back away from the metal a little and move into it. If the oxygen cutting jet can’t get all the way through, molten metal will come right back up and contaminate the tip or even hit you in the face. When you push the cutting jet lever, push it all the way in. Keep the preheat flame up off the metal 1/16 to 1/8 of an inch or about three millimeters and try not to move the torch head up and down, keep the torch nearly perpendicular to the metal and move with a steady, smooth progression across the cut. Ideally, you want to move as fast as you can and still have the oxygen cutting jet go all the way through the slot you made. When cutting the front edge is sort of half round and while you’re cutting, you want to keep the flame against the cut line. When you’re done take pressure right off the cutting jet lever and turn off the torch.
Now, this really is simple, but I’ve seen people make some rough cuts. So let’s take a look at a few things that might help you out. Probably the number one reason for not making a good cut is a dirty tip. Always use a good quality tip such as those made by Forney, Harris, Victor, or Allied. Any contamination on the face or cutting jet or orifice will cause the oxygen jet to swirl, slowing down the progress, widening the cut and gouging into the sides of the cut. Keep some tip cleaners handy and use the file looking thing to dress up the face. Remember keep your tip clean, get comfortable before you start, and concentrate on the cut while it’s happening. Good brands of tip cleaners include Victor, Irwin, US Forge, and Tech Team https://techteamproducts.com/. We like Tech Team’s 762 Tip Cleaner Set because it has all the correct size reamers, a file, and it comes in a handy storage case. https://www.amazon.com/Tech-Team-Long-Pattern-Cleaner-Oxy-Acetylene/dp/B07NGV9CS2/ref=sr_1_1?keywords=tech+team+tip+cleaner&qid=1553187220&s=gateway&sr=8-1. Clean the preheat orifices so the flames will sharpen up and you absolutely need to keep the cutting surface clean. In the long run, you’ll save time by taking a few moments to keep your tip clean and clean the cutting jet orifice after every four or five cuts because it’s easier to keep it clean than to let it get too messed up and have to fix it. You want the metal as clean as possible. Any impurities on the surface will take heat away from the cut slowing down the progress. In the shop most of the metal will be new, but when you start making repairs or modifications, use a wire brush to clean dirty rusted metal. Paint can be burned with a torch then brushed off. Check the bottom side. For any contaminants on the bottom may stop the oxygen cutting jet from getting all the way through. If the preheat flames are adjusted too big or you have an oxidizing flame, the top edge of the cut can burn and melt away. If there’s not enough oxygen pressure, the cutting jet may not get all the way through and too much oxygen pressure can cause the cut to widen at the bottom. Ideally, the slag should blow through the cut. If the metal gets hot enough, the slag will stick to the bottom edge. You want the cut to progress smoothly. That’s why you need a clean tip, clean metal and the torch and regulators adjusted properly. When the progress slows down for any reason, the metal heats up and the slag will stick. Now this happens to everybody, you can’t always make a perfect cut. Generally, the slag comes off easily using a chipping hammer and hitting it back towards the edge. If you’re not cutting all the way through, first check to make sure nothing is on the bottom side of the metal. If that’s OK, you may not have enough oxygen pressure or you’re trying to move too fast and instead of the slag blowing through you can see it coming right back up in the cut kind of making a mess of things.
When this happens, you can’t just back up and start over because that slag melts before the metal and you won’t be able to get all the way through. One thing you can try is to back up to where the cut is good. Preheat one edge of the curf and cut the metal right alongside of the first cut. You will end up with some grinding to clean it up, but you can get going again. If the cut just stops while you’re moving along check the preheat flames to make sure you have enough heat to sustain the cut, but most likely you’re moving too fast. As long as you are cutting all the way through, you can restart right where you ended. There’s probably a little slag on the bottom side where the cut stopped. So when you preheat again, make sure the metal gets plenty hot. If that slag on the bottom side isn’t hot enough, the cutting jet may not get through and it can gouge out the bottom of the curf.
Now, when you’re making long cuts, you can’t make the whole cut in one shot. You’ll have to stop and reposition yourself. You can restart right in the curf. If one piece is not going to be used you can start on that edge, move up to the cut and keep on going. On finish cuts that need to be polished out, you can cut away from the line a little, reposition yourself and restart in the cut out. This way you can be sure not to leave gouges where you begin again. There’s always a chance of gouging into the sides of the curf when restarting. If you are cutting steel pipe or I beams you need to pay even more attention. So try to keep the stops and starts to a minimum.