
Shelving Installation Tips
Shelving Installation Tips
We can all use more storage, especially in our garage so I’m going to put up shelves so that I have some more storage space on the wall.
The important thing with shelving if you’re going to be putting weight on it is you want to make sure that you get it installed into the studs. So you want to make sure you find a stud in the wall. You can do it a lot of ways, stud finder, the old, you know, tapping on the wall, or I think the easiest way, especially in a garage is look for nail pops. They are little bumps in the wall and they usually come in two’s because when you install drywall, you put nails or screws around the edge. So there’s a little bump here and a little bump there. That way I know that’s a stud. I mean, it’s a garage and I don’t care if I make a mark on the wall. Then I can go 16 inches off of each one and find the next stud. So I go 16 inches and I see two more nail pops.
The first thing I want to do is set my height, I want to draw a level line on the wall using my Stanley 24” bubble level. They hang with little tabs that set in the wall and that’s what hangs the shelf. So I’m going to strike a level line across from my stud. So I have a line and I’m pretty confident there’s a stud there and if there’s a stud, my Dewalt screw gun is going to start to ratchet. If not, it’s just gonna go right in first try so I mark my 16 inch centers all the way around, all the way across so now I have the line for my shelf. Because this shelf is used it has tabs on it, I got to see where I’m going to want them. Where my tabs are now, I just have to move them down to gaps to get them where I want them, and that’s going to require a tool, a little screwdriver. This will work just to pry them open a little bit.
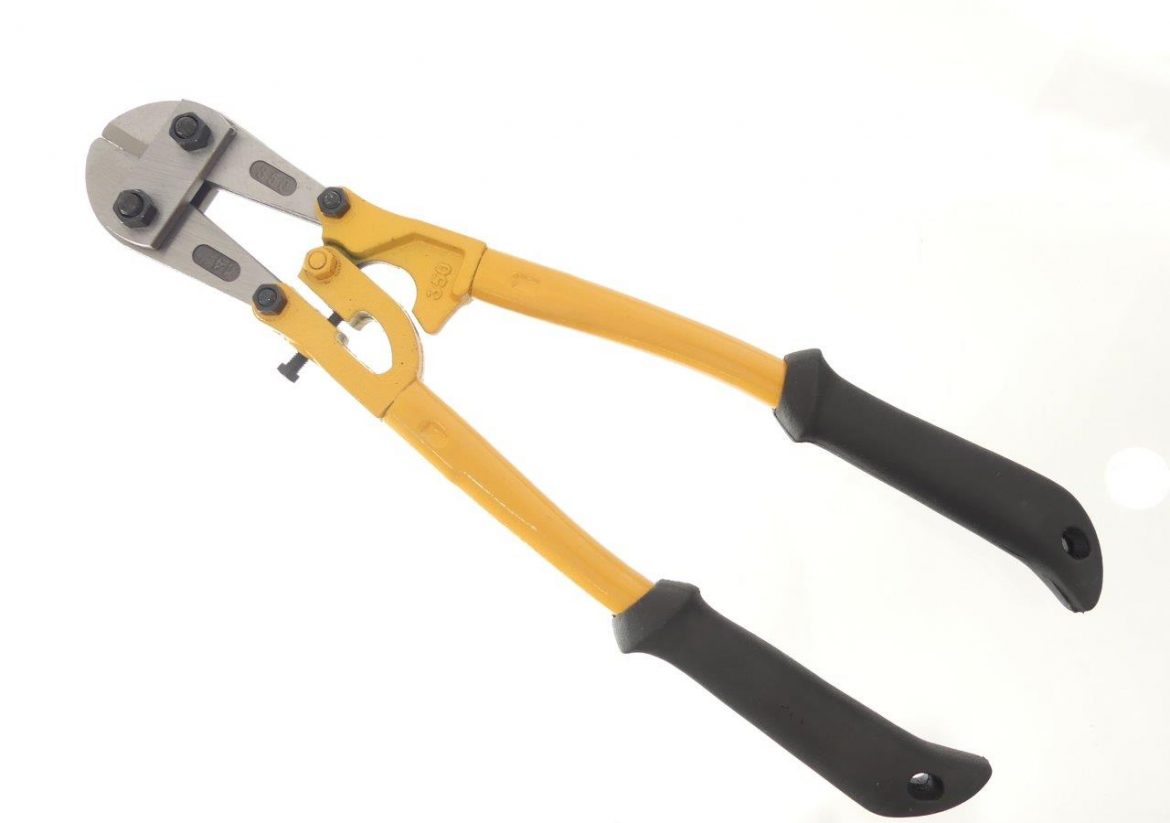
If you’re using new Closet Maid shelving, these tabs aren’t going to be on there, so you’re just going to install them and there’s a lot of different tabs. Go with what the manufacturer says, obviously read the directions. Even though I currently don’t have directions for these because these are used. I could always go to the Home Depot website to get them if I really wanted. I could also do a Hey Siri or Hey Alexa search. The important thing is when you’re putting these back on, make sure you put them on the right direction, flat side against the wall. I have one that I started already so that’s what I’m gonna use to just hold the shelf up. But once you get one up, that’ll kind of hold it and then part 1 is complete. Obviously, this doesn’t make for much of a shelf just hanging there so I’ve got to put supports on. They clip on the front of the shelf and then they go into the wall and they connect the wall to the shelf. You have to put them in because you want them to be strong and hold up for your heavy paint cans or your Christmas decorations and whatever. You also need a little level or a big Stanley or Great Neck 24” bubble level or something that can get in between and you can level your shelf. The shelf brackets hook around the top rail of the shelf and they also have a little notch, so you can either put them between the wires or on the wires, so you don’t have to worry about the spacing wherever your studs are. Check your level and set your screw. I’m just gonna finish up the other two and that’s a very sturdy shelf it will carry a lot of weight. You can put all your stuff up there including paint cans. Well, I just have 2 paint cans right now, you get the drift. So it’s an easy project. I think in a garage environment, this kind of shelving is very practical. It’s not too expensive. Even if you’re not fortunate enough to have somebody give you some. So that’s it for this easy project. One more point, and that is that you can cut wire shelving to length. All you need is a simple tool. Bolt cutter blades and mechanisms are heat treated drop forged tool steel to give them the ability to cut through hard material. You cannot expect a blade with an HRC 35 hardness to cut a lock shackle with an HRC 65 hardness. To do that job you need something equal to, or harder, which is what a bolt cutter does. The blades are extremely hard and extremely strong. Bolt cutters are used in numerous applications, and there are several manufacturers of bolt cutters such as Porter Cable, Tekton, Stanley, Craftsman, and Tech Team https://techteamproducts.com/. We happen to like Tech Team’s because they are drop forged hardened tool steel, adjustable, and have comfortable rubber grips. They are manufactured in sizes of 8” length https://www.amazon.com/Mini-Bolt-Cutter-Spring-Loaded-Comfortable/dp/B079SPZC1G/ref=sr_1_3?ie=UTF8&qid=1546894097&sr=8-3&keywords=tech+team+8%22+bolt+cutter 12”length https://www.amazon.com/Cutter-Compound-Action-Cable-Comfortable/dp/B079T9YMV8/ref=sr_1_4?ie=UTF8&qid=1544568105&sr=8-4&keywords=tech+bolt+cutter and 14” length https://www.amazon.com/Tech-Cutter-Compound-Action-Comfortable/dp/B07JNCFRKL/ref=sr_1_3?ie=UTF8&qid=1546894228&sr=8-3&keywords=tech+team+14%22+bolt+cutter which makes them extremely handy for the average household. Most people don’t understand the utility of having a bolt cutter but once you have one around, you’d be surprised at how many uses you have for it. In fact, it is almost the perfect preppers tool as it can function for cutting wire, cables, fencing, locks, and other materials that may be an issue in case of an emergency. Yes bolt cutters, wire cutters, and cable cutters are truly handy and useful tools.