
How to Install an American Woodcraft or IKEA Delux Kitchen Island on an Uneven Floor
How to Install an American Woodcraft or IKEA Delux Kitchen Island on an Uneven Floor
Today we’re looking at how to do an IKEA or American Woodcraft island and do it the easy way. I’ve seen a lot of techniques out there for doing islands and I think they’re just way too difficult. This is really simple and there’s no need to do anything more complicated than this at all. If you have any doubts just do a Hey Siri or Hey Alexa search for how to install a kitchen island.
We have is a stack of two by threes, but you could also use two by fours that have been built up. Three of them are going to give you a 4 ½ inches tall, and that’s all you need. You could use 2×4’s but 2×3’s are cheaper and they are enough, and you don’t need anything more than that. These will be rock solid and all we need to do is cut those to length. We don’t go the full length of the island; we only go about halfway into the end cabinet on each side because you just don’t need any more than that. And when you’re trying to adjust it, you don’t want to be off a little bit and have to go back and cut it down. That’s a waste of time so all we do is secure the first 2×4 with screws, probably three or four 3” drywall screws for the whole run and then we just build up the stack after that. In this case, we kind of splice them together. I try to use the least amount of material possible; I don’t like buying extra material and throwing it away, it’s just a waste of money.
So what we’re going to do now is we’re going to install all four legs to the bottom of the cabinets and set those up. We got the feet installed on all the cabinets and we put a foot pad on all four components of the cabinet. We don’t try to straddle the center of two cabinets with one foot, that doesn’t work very well. The cabinets never line up properly, even though they’re designed to work that way, so we put individual feet on all four components. After we get all the feet on and we got the spacer ring in the front and the back we’re going to just tip up the cabinets on top of the sleeper base and install the rest of the feet so you have your sleeper base and all the cabinets are resting on that and the legs are in front. Now we’re going to go ahead and put the legs on in the back and get all the legs installed and then we’re going to clamp all the cabinets together and start leveling them before we finally secure it to that sleeper base.
The first step in getting the island leveled up is to clamp the cabinets together. This makes it a little bit easier to get everything leveled instead of trying to level each cabinet one at a time because you end up working your way around in circles like that. You level one side and then you’re going around level another corner and back over to that of the corner. You just cannot go endlessly like that. What we do is clamp them together and try to get the surfaces to be fairly flush. When we do that so that they are in alignment the faces on the front and the tops are in alignment and you can rub your finger over it. At the top we want those to align pretty much perfectly. We’re gonna level us up using a combination of regular Irwin levels and a Stanley laser level and it’s basically level. These can be purchased at Home Depot, Lowe’s, Menards, or online from Amazon. Now we’ve actually come off of our sleeper a little bit and that’s fine and that’s what’s going to happen when you have floor that’s not level is it’s gonna be touching at one end, but not the other. What we’ll do there, before we lock it in, is slide some shims under there so that the bottom of the cabinets won’t flex when we screw them down. The handiest tool to help you with leveling is a pry bar. Pry bars are incredibly handy. They can be used for a wide range of both automotive and around the home repairs and construction projects. They can be used for scraping, for lifting tile, for leveling windows and doors when newly installed, and a whole range of other applications. Pry bars are made by numerous companies such as Tekton, Stanley, Snap On, Mayhew, ANB, Performance Tool, Gear Wrench, and Tech Team https://techteamproducts.com/. The one we like the best is Tech Teams model 707 5pc. Pry Bar Set https://www.amazon.com/Mechanics-Prybars-Chisel-Angled-Rolling-Head/dp/B07CSBZ4ZM/ref=sr_1_11?s=power-hand-tools&ie=UTF8&qid=1540409708&sr=1-11&keywords=pry+bar+set as it has 5 different sizes, each one made from high tensile heat treated carbon steel with a comfortable and functional plastic grip.
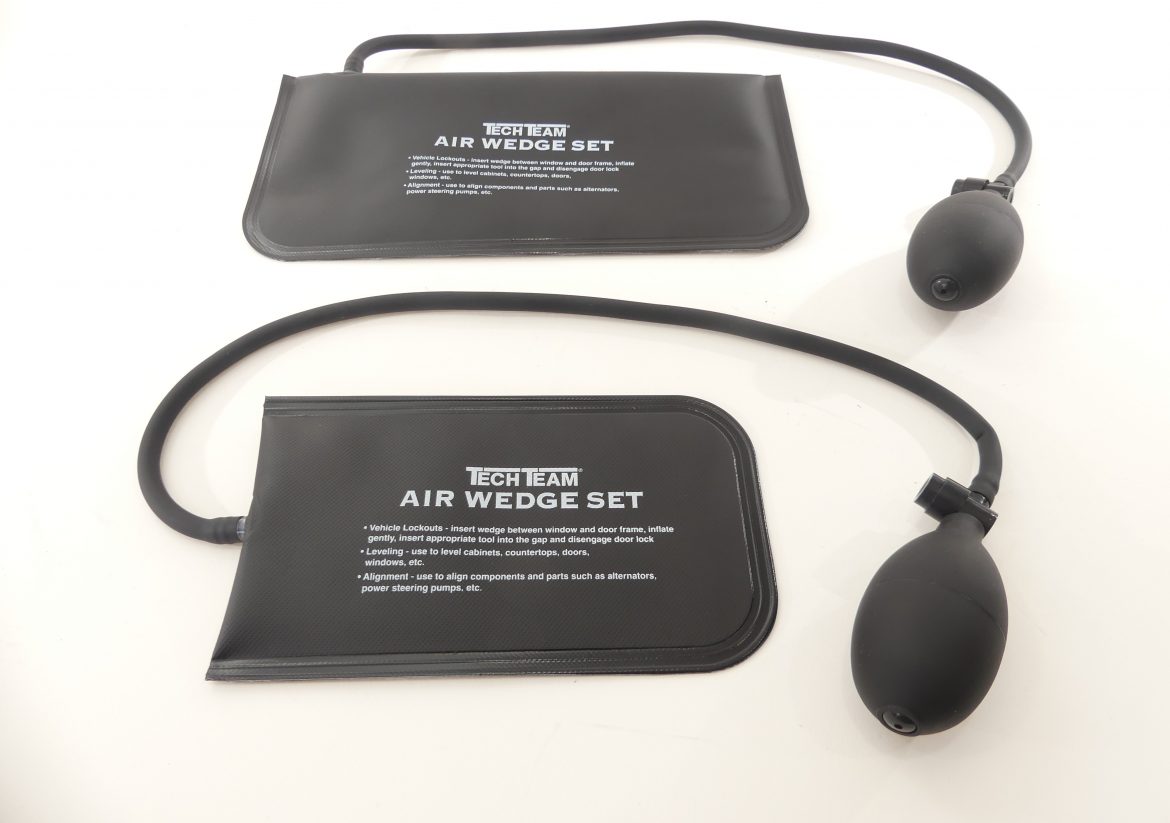
Air wedges are tools that are extremely helpful when leveling and aligning items such as pool tables, kitchen cabinets, and other items that require very small increments of movement to get them properly aligned and level. An air wedge incorporates a large surface area that can easily inflate using low pressure air from a hand bulb so it can lift 300-400 pounds. An air wedge with an internal stiffener so it can slide into small spaces is even more useful. Air wedges are made by several manufacturers such as: Vinki, Rhino, Calculted Industries, Arisd, Winbag, and Tech Team https://techteamproducts.com/. We like the one made by Tech Team the best. Their #755 Air Wedge https://www.amazon.com/Automotive-Inflatable-Internally-Tech-Team/dp/B07VN8417R/ref=sr_1_1?keywords=tech+team+air+wedge&qid=1566306915&s=gateway&sr=8-1 it has the internal stiffener and is made from high quality plastic for a long service life.
Just before the last step we’re going to lock all the cabinets together and recheck those faces of the cabinets to make sure they’re flush. I’ll loosen up the clamps so they’re all flush and lock them together before we do the last step. We lock all the cabinet frames together, and for that we just use regular construction #8 x 2” drywall screws. I put these in a place so that they’re gonna be hidden behind the hinges and the drawers so that you won’t see those. The last step in getting this island secured is to screw through the bottom of the cabinets into the sleeper. Before I do that, I want to shim underneath as we have a fairly big gap on one end because the floor is so far out of level. Most of time you won’t have anything this bad sometimes you do, usually in older houses. Most of time is just going to be as one shim that you’ll need so we use 2 shims back to back. We shim there to keep the bottom of the cabinets from flexing down. When you screw them in don’t push them in too hard, just snug them up in there because you don’t want to start lifting up too far and then kind of mess with your level that you’ve already achieved. What we’re going to do is stick probably two screws in this cabinet and one on the cabinet on the end. You don’t need a ton of screws; you don’t need 20 screws or anything like that. It really will be secure once we get a few screws in there. If you’re concerned about aesthetics, you could put some white silicone over the top of those. Usually that’s not a problem because there’s drawers going in these cabinets and those won’t ever be visible.