Tips on How to Put Together a Queen Metal Bed

Tips on How to Put Together a Queen Metal Bed
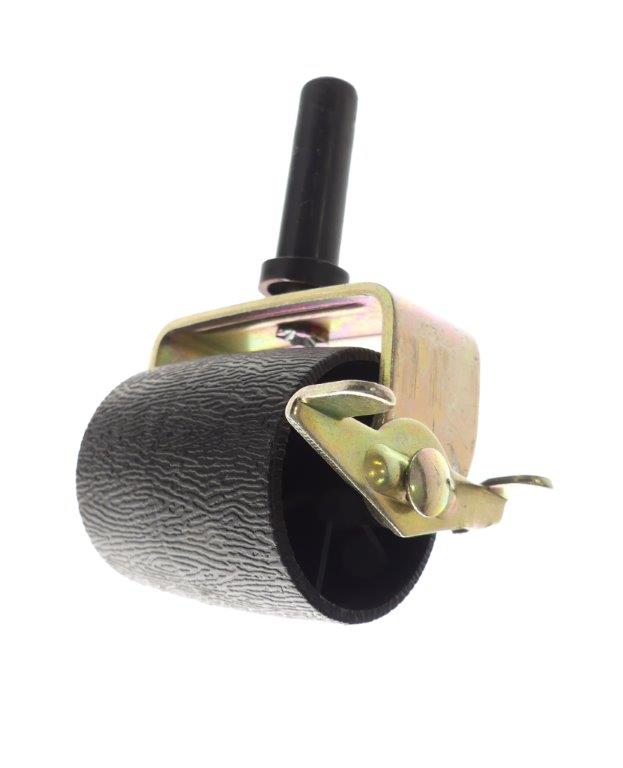
I’m going to explain how to set up a steel bed frame that I bought from Sleepy’s to put underneath your mattress. This is going to be a Zinus queen sized frame that has five legs and a center support bar, but it also adjusts to fit full and twin size mattress as well. To help me with this I went to Hey Siri to get an instruction sheet, but you could also do Hey Alexa or Hey Google, your choice. After taking out the frame from the box what we have are two side rails that will have arms that come out on either side. We’ll also have a center support beam and then we’ll have five slides that go on the bottom of the feet, 2 end caps, and then a little locking mechanism that will secure everything in place at the end. This is a good time to think about replacing the feet with locking bed casters. Although you may not realize it, when you buy an inexpensive steel bed frame from Amazon, Wayfair, Walmart, or Target, it almost always includes a simple plastic fitting that goes on the bottom of the legs of the frame, and this is the only thing between the bed frame and the floor. Clearly if you want to have the flexibility of being able to move the bed for cleaning purposes, etc. you would need some type of wheel or caster system. The only drawback to the typical caster is that the bed can move around the floor when it is occupied. The way to solve this is to purchase bed casters that are lockable. This type of caster is made by several companies such as iPrimio, King’s Brand, Malouf, KHome, Shepherd Hardware, Slipstick, and Tech Team https://techteamproducts.com/. We tend to like Tech Teams model 739 https://www.amazon.com/TECH-TEAM-Locking-Casters-Bedframe/dp/B07D431KL8/ref=sr_1_1?crid=1BZNLDQ92S4PH&keywords=locking+bed+casters&qid=1553866494&s=gateway&sprefix=locking+bed+%2Caps%2C201&sr=8-1 the best because it has extra wide and large wheels, which are set into a 2mm thick steel frame with a rust and corrosion proof zinc dichromate finish, and it includes a secure locking mechanism.
What I like to do first is start by laying out the two side supports for where the mattress is going to go. You also want to make sure that the little bracket that sticks out on one end is the one that’s facing the wall. Once you have them in place, you’re going to take the feet and you’re going to put them on the metal leg sockets and make sure that they’re secured. Sometimes it’s good to just give them a little bump on the ground, make sure they’re getting in there and do that for the other one. All right. Once those are securely in place, all you need to do is just bring up either side and then just turn them towards each other. Once you have them in place. You’ll find the appropriate size that you want to have your mattress, which for us is the queen size so we’re going to use the setting for the queen. You basically put the two little knobs in the two holes and slide it together and you’ll hear them click into place. To lock them in the place all you need to do is take that little lock and put it right in the hole between them and do that for the top end as well. Now, what we have left is that center support beam and again we have another little cap for the bottom of the foot that you would put into place. We just need to make sure that the frame is where we want our mattress to go into and then slide the center support beam into the center of the bed to give it a nice center support. Then all we have left are the little caps that we’ll be putting on the end of the bed just to make sure if you accidentally hit it, it’s not going to scrape you or scrape your mattress.
Simple as that.
