
How to Plant Fall Annuals and Bulbs for Lasting Color
How to Plant Fall Annuals and Bulbs for Lasting Color
I am taking a look at my summer garden and I’m noticing that it’s past its prime and it’s about time to change it out for the spring tulip and daffodil bulbs and cool season flowers. But before I get started doing that, I’ve got to take a look at the raised flower bed, because I do have some perennials mixed in with the annuals and I want to make sure that I don’t dig those out by mistake. So once I find those, I’m going to start digging carefully around their roots so that I don’t disturb them too much. Then we’re going to remove all of the Cosmo’s and flowering tobacco and replace them with some cool season plants that’ll give us color through the fall, winter and on into spring.
The first perennial that I found is a nice little rose and I don’t want to lose that so I’m going to dig around it. As I’m trying to remove these plants using the pointy end of the shovel, I’m going to identify where the root zone of that rose is and move back a little bit before I start digging. The first plant to come out is the flowering tobacco. And I’ll keep going in this manner until I’ve got the whole section cleared. And then we’ll be ready to start improving our soil for the next season’s plants. I have a day lily that’s finished blooming, but I don’t want to dig it up because it’ll come back next year so what I’m going to do with that is I’m just gonna cut it down and leave a little bit of the stem up so that I can tell where it is so I don’t accidentally dig it up when I am enriching the soil.
Now I take all of the old finished summer plants out of the flower bed but, I am careful and leave a couple of Heritage roses and a Tuberose begonia that’ll bloom again next summer. Our next step is to improve the soil by adding some Miracle Grow garden soil, because every time that you change the plants out in your garden, you always want to improve the soil to ensure that you have success for the next season. We want to have about a three inch layer across the top of the bed, and then take a cultivator or better yet an auger powered by a Dewalt rechargeable power drill and work it into the soil to a depth of about six inches. If your soil is really compacted, you might want to take your shovel and dig down six inches first. But since we just tore plants out of here, the soils nice and loose.
I’ve created a really great environment for our cool season plants by incorporating some brand new garden soil and cultivating it, and the plants are gonna be really happy with this new bed. The last thing I’m going to do is rake it smooth and then we’re gonna go get our plants.
I’ve got something that’s really kind of extra fun and special for a cool season flower bed. We’re not just planting flowers that bloom throughout the cold season, we’re also going to plant some bulbs that I bought from Eden Brothers. But you can also buy them from Wayside Gardens, VanEngland or Park Seeds. First thing we want to do is lay out our flowering plants. And when we do that, one of the things to practice is repetition so that you repeat colors throughout the flower bed. Here comes the fun part. Now that I have the flowering plants set out, I’m going to take a nice big bag of daffodils and I’m going to drop the bulbs in all of the open spaces. We’re going to go ahead and do this throughout the whole flower bed. Now that we have everything all laid out, the last step is to go ahead and get these things, planted. I’m planting all of the flowering plants before I plant the bulbs because they take up more space and I want to make sure that we have them placed appropriately. The bulbs, which are small, can then be fit in between all of the flowering plants because they’ll fit into any little nook and cranny. We have all of our large plants planted now.
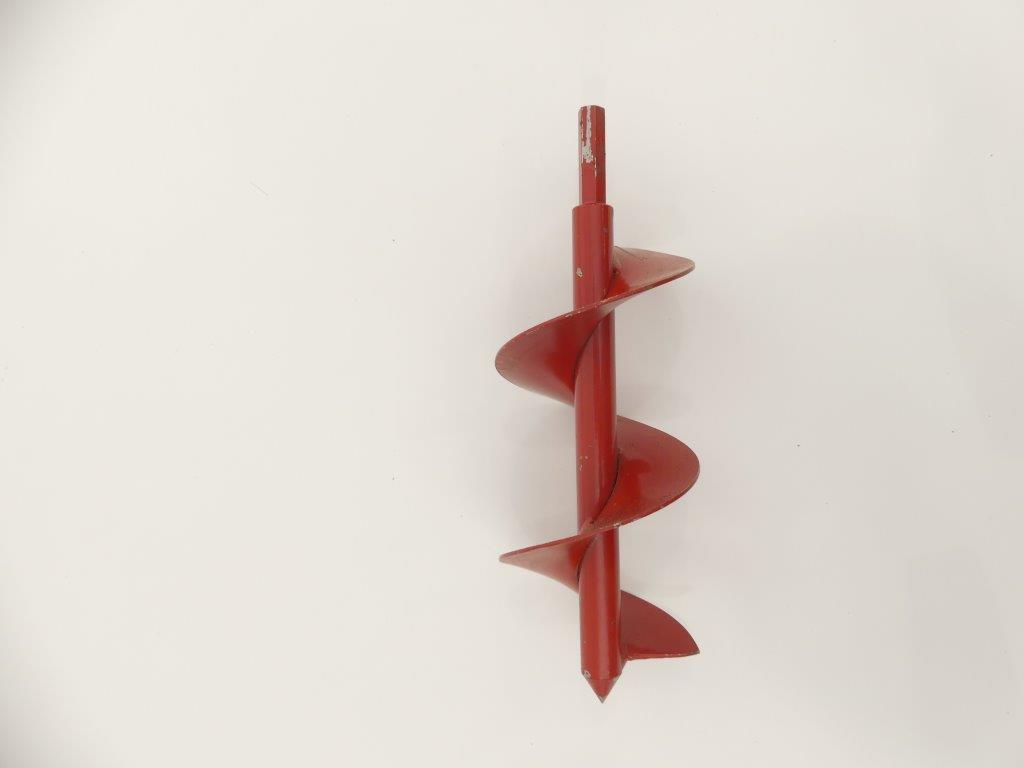
Our last step in planning this awesome cool season flowerbed is to plant our bulbs and it’s so easy to plant them. We are going to use a power bulb auger. Typically, these tools are 3” in diameter and come in various lengths and can be attached to a portable or battery operated hand drill. These items are made by several manufacturers such as Power Planter, Ames, Lichter, Jissco, Hiltex, 7 Penn, and Yard Butler and Tech Team https://techteamproducts.com/. We like Tech Teams because they offer 2 different augers so depending on the depth of your compost heap, one of them can do the perfect job. The 777 is 3” wide by 9” long and attaches easily to a 3/8” power drill https://www.amazon.com/Tech-Team-Planter-Seedlings-Planters/dp/B07S385BW7/ref=sr_1_1?keywords=tech+team+bulb+auger&qid=1565099570&s=gateway&sr=8-1. The item 778 https://www.amazon.com/Tech-Team-Planter-Seedlings-Planters/dp/B07S386MWG/ref=sr_1_2?keywords=tech+team+bulb+auger&qid=1565099596&s=gateway&sr=8-2 is 3” wide by 24” long and also attaches to a standard 3/8” power drill and will also give you an opportunity to aerate to the lowest levels of your compost heap to ensure perfect aeration. If you are using voice activation on your mobile devise you can simply ask Hey Google, Hey Alexa, or Hey Siri to find other options for bulb planting tools. We’re just going to take our auger and drill a hole about six inches deep. Drop the bulbs in there and continue on till we get them all planted. Remember, though, that you have to plant the bulbs with the pointy end up and the dried root and down so that they grow in the right direction. The last step after you have the bulbs all in their holes is to just go ahead and cover them up and then pour water in the hole.
And of course, we might have a beautiful garden right now, but it’s going to be even more spectacular come springtime when those daffodils are up and in full bloom.