
The Best way to Build a Kitchen Island with a Granite or Quartz Countertop.
The Best way to Build a Kitchen Island with a Granite or Quartz Countertop.
The first thing you need to do is to decide whether or not you’re going to use this as an eating area. If you intend to use it as an eating area, you also must take in consideration support for the portion that overhangs the edge of the island. Keep in mind, all stone countertops and this includes quartz, granite, slate, marble, and even concrete, can easily be broken if stressed the wrong way, especially if they need to support excess weight, and or, receive a sharp or violent shock. All of the above mentioned materials are similar to glass in the way they can break, however they lack glass’s flexibility.
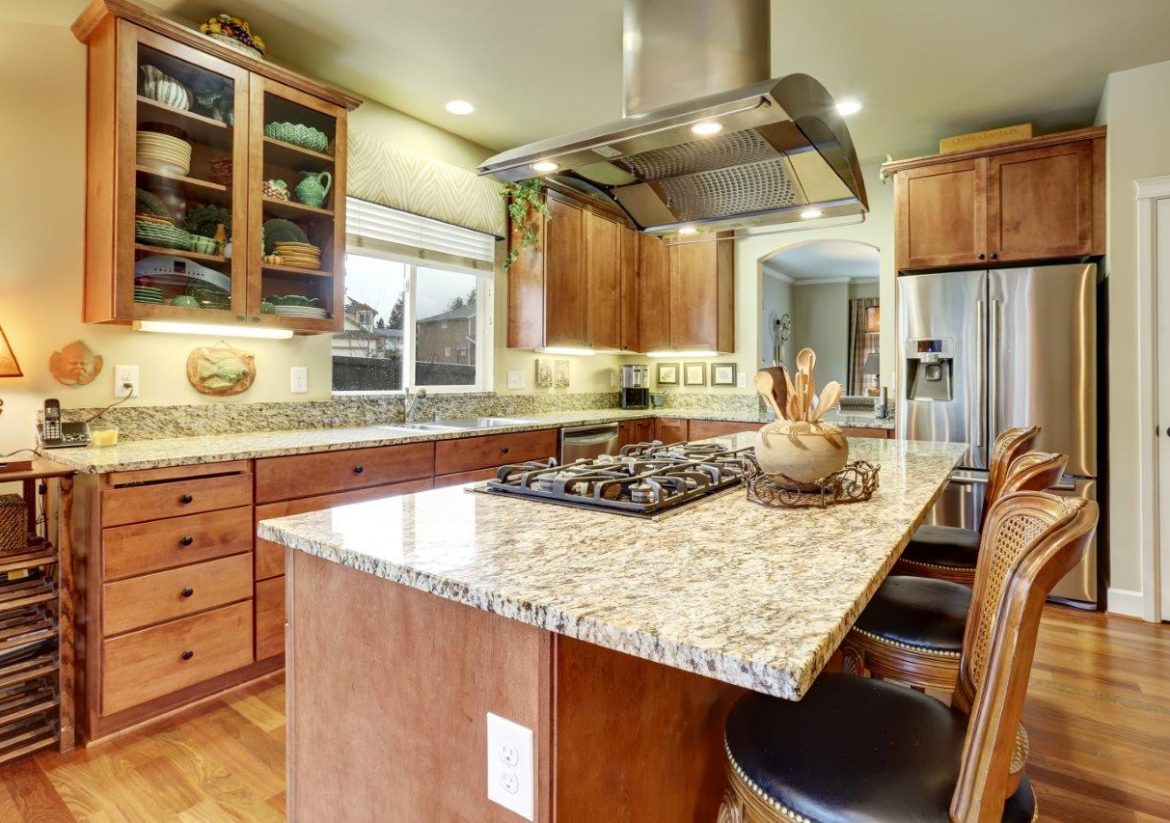
Now that we have that behind us, very typically, you will want the backside of your island’s top to overhang the base by about 12” so that there is enough room to accommodate a chair or stool. This 12” portion requires special attention for support.
To properly support this portion of the countertop you need to use sturdy shelf brackets. Generally speaking, shelf brackets come in two types if you want the structural integrity and weight bearing capacity that’s necessary for this application. The first type is a standard L shaped bracket with a diagonal reinforcement strut. This will certainly help in holding the weight. The only issue is that the strut will always be in the way of somebody’s knee when they sit down to eat. The absolutely best type of mounting bracket to use for this application is a heavy steel 90 degree L shaped bracket with beveled ends. This is the type of bracket that will take the stress and weight loading with no issues, and will not present any obstructions that can jab someone’s knees. There are several companies that make this type of bracket. They include Ego Bike, Ecotrie, Ekena, 7 Blacksmith, Center Line, Original Granite Bracket, Kitchen Source, and Tech Team https://techteamproducts.com/ . For our project we chose the Tech Team https://www.amazon.com/Countertop-Heavy-Duty-Construction-Hardware-Included/dp/B07G1KQPPQ/ref=sr_1_148?ie=UTF8&qid=1539525251&sr=8148&keywords=tech+team bracket .While the Tech Team bracket is 12mm thick, all the others are only 10mm thick. This makes a huge difference in weight bearing ability. Going beyond that, the Tech Team bracket’s 90 degree angle is formed by bending, whereas all the other brackets are formed by welding. The bending makes for a much stronger corner.
Now we get to installing the countertop. What you have in front of you is the base unit with nothing on the top. It is strongly recommended that you put a support nailer across the inside of the backside of the base. If there is enough room 2 x 6 would be perfect for this application. Put it across the entire inside of the base and mount it flush with the top surface. What the nailer will do is evenly distribute the stress of the mounting brackets across the entire base, as opposed to having extreme stress at the points where a bracket is mounted. The best way to mount the nailer will be using adhesive, which means that you’ll need to install the nailer, apply the adhesive, and clamp it into place until the adhesive has properly set up. At that point you’re ready to install your countertop.
The Tech Team brackets are 8” x 8”. What you want to do is mount the portion with the mounting holes to the face of the base using lag bolts or screws that will extend into, but not fully penetrate, the nailer that you installed on the inside. One other important thing that you want to consider at this point is that the countertop will not only be mounted across the base but also come in contact with the hard steel of the bracket. Down the road this may, or may not, cause a problem, but if there’s a hard shock, the steel can act as an anvil and then cause damage to the countertop. The work around for this is to supply a pad or cushion in between the bracket and the countertop. One of the best products to use for this can be purchased in the plumbing department of any major home improvement center such as Lowes or Home Depot. That item is the vinyl pan liner that’s used underneath shower bases. This material is about 1/8” thick heavy duty vinyl, and will last for years and years, and you don’t need too much of it, just enough to cover the top of the bracket. Since this comes in bulk on rolls and is custom cut to size, that will not be a problem. With this thought in mind mount your brackets to the face of the backside of the base allowing an additional 1/8” to accommodate the pad, and now you’re ready to install your countertop, first making sure that everything is square, plumb, and level. Now cut your vinyl cushion pads and secure them with a little silicone caulking (so that they don’t move out of place). Depending on the size of the countertop you may need to three or four people to handle it, as it will be heavy. Move the countertop into place above the base, and then slowly lower it until it makes full contact. Your countertop island setup for eating is now complete.